Sponsored Content
Step-by-Step Instructions for Every System
Ready to shake off the cold cloak of winter from your RV? Here are some excellent tips to help you reverse the winterization steps you took in the fall to dewinterize your RV and get it ready for the travel season. As the frost melts and the trees start to regrow their leaves, it’s time to prepare your home-on-wheels for the adventures that lie ahead. In this comprehensive guide, we’ll walk through the pivotal steps necessary to bring your RV out of hibernation and into the sunny embrace of spring and summer travel.
What is RV Dewinterization?
At its core, dewinterizing your RV involves preparing your motorhome, travel trailer, or other RV for use after a period of winter storage. This process ensures that all systems are safe, functional, and ready to hit the road. It’s a crucial transition from the preservation steps you took in the fall to active use.
Importance of Properly Dewinterizing Your RV
Overlooking even a single step in the dewinterization process can lead to inconvenient malfunctions or costly damages. By following the procedures here, you will safeguard your investment and ensure a smooth, hassle-free camping experience.
Steps for Dewinterizing Your RV
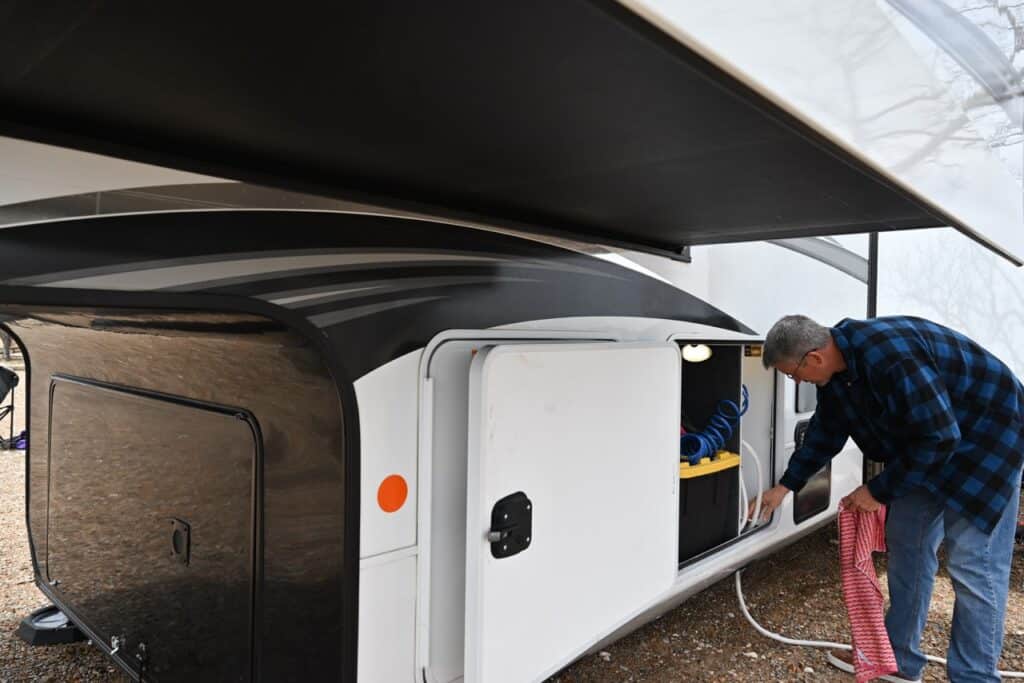
Step 1: Reconnect Plumbing System
The plumbing system is the lifeline for water usage in your RV and the key focus of your dewinterization effort. To begin, ensure that all valves and outlets are closed before introducing water into the system. Next, reconnect the main water supply and gradually fill the system, keeping a keen eye out for any leaks that may have developed during the cold months.
Flushing Water Lines
With the water supply reconnected, flush the lines to clear out any antifreeze used in the winterization process. Running fresh water through every faucet, showerhead, and toilet will help remove residual chemicals and contaminants, making the water safe for use again. Don’t forget appliances like dish/clothes washers and refrigerator icemakers (there are safer ways to make pink ice cubes), as well as your outdoor shower or spray port.
Checking for Leaks
After you flush and repressurize the system, inspect all accessible pipes, fittings, water appliances, and faucets for signs of leakage. For pipes that are hidden, check for signs of water leakage below the areas where these pipes are installed. Early detection of moisture or drips can prevent more severe water damage down the line. Water damage to an RV is arguably the most expensive issue you could face as an RV owner.
Testing Water Flow
Once the system has been flushed and checked for leaks, test the water flow at each outlet. Make sure hot and cold water are functioning properly, and the water heater is operational without any hiccups. If you did not fill your water system with anti-freeze before the winter, you will get pockets of air coming from the outlets. Run the water at each outlet until you have a steady stream of uninterrupted flow. Fire up your fridge and start the icemaker. You will probably have to make 1–2 buckets of ice to clear any antifreeze from the system.
Step 2: Check Electrical System
The electrical system in your RV powers your journeys, so giving it thorough attention is vital. Begin with the heart of the system—the batteries.
Reinstalling Batteries
The best practice for RV batteries in cold weather is to uninstall them and store them inside in a warm dry area. This prevents the batteries from freezing and cracking open from the water expansion, meaning you will have to replace them. Alternatively, if you have the option to keep the RV plugged in or a trickle charger connected to the batteries, that will keep them charged and they will not freeze. If you did uninstall them, you will need to reinstall the batteries.
Inspecting Batteries
Inspect the batteries for any signs of corrosion or wear. Clean terminals and connections, and ensure they are tightly secured. Charge the batteries fully and test them to make sure they hold the charge as expected.
Testing Lights and Appliances
With the batteries in check, move on to testing all interior and exterior lights, as well as appliances. Replace any burnt-out bulbs and repair faulty wiring detected during the test. Look for signs of rodents chewing through wiring.
Ensuring Proper Connections
Review all electrical connections, including power cords and outlets, for integrity and safety. Tighten any loose connections and replace damaged components to prevent electrical failures or potential hazards.
Step 3: Reverse Winterization Steps
Reversing any other steps taken to winterize your RV is just as crucial as the initial preparations were at the end of the last travel season.
Removing Insulation
Remove any added insulation from water lines, vents, and other areas. Ensure that these areas are free from obstructions and ready for optimal airflow and function.
Pest Prevention Measures
Assess the condition of any pest prevention measures put in place. This includes checking for blockages in vent covers and inspecting for any signs of infestation. Repair any breaches and clear out unwanted guests. Remove any poisons or traps that you placed in the RV in the fall.
Checking Seals and Vents
Examine all seals around windows, doors, and vents to ensure they remain airtight and watertight. Cold weather can harden and crack rubber and plastic and deteriorate their effectiveness. Replace or repair any seals that show signs of cracking or wear.
Step 4: General Maintenance
General maintenance is the final touch in the process of dewinterizing your RV. It’s time to give your rig the once-over, both inside and out.
Dehumidifying the RV
Blowing wind and snow may have caused moisture to come in to the RV. As things warm up and thaw, it’s a good idea to remove this moisture before it causes odors or, worse, mold. Run exhaust fans to move dry air through the coach and use a dehumidifier in extreme cases.
INSPECT. THE. ROOF.
Roof inspection in both spring and fall is our number one recommendation for RV owners to prevent costly repairs. Repairing damage from water coming in to the RV from the roof will be a costly expense, so it’s prudent to make sure that everything up there is in good order. Inspect the surface of the roof for any tears or other damage and repair it with lap sealant or roof tape. Also, look for any cracks or missing pieces of lap sealant. That’s the goop that’s over top of any seams and around every installation on the roof. You don’t have to remove any sealant, just install more lap sealant over top of the affected areas.
Cleaning Interior and Exterior
A thorough cleaning not only enhances the appearance of your RV but also allows you to inspect surfaces for any damage. Wash the exterior, wax if necessary, and clean the interior from top to bottom.
Checking Tire Pressure
Check the tire pressure against the manufacturer’s recommended levels. Adjust as needed to ensure safe and efficient travel.
Assessing Propane Levels
Verify that propane tanks are filled, connections are secure, and appliances that run on propane are operating correctly. Also important is to check for any propane leaks for safety. It’s most important to check connections when the system is pressurized. Spray soapy water on the connections and look for signs of bubbling.
Conclusion
The process of dewinterizing your RV is a critical step toward ensuring a smooth, enjoyable travel experience during the warmer months. By systematically flushing the antifreeze from the plumbing system, inspecting the appliance and electrical systems, replenishing the freshwater system, checking the tires and battery, and addressing any maintenance issues that may have arisen during winter storage, owners can safeguard their vehicle against potential malfunctions and damages.
Properly dewinterizing your RV not only contributes to the longevity and performance of the RV but also underscores the importance of preventive care in RV upkeep. It is advisable for owners to adhere to a comprehensive checklist and, if necessary, to seek professional assistance to address complex or unfamiliar issues. By taking these steps, RV enthusiasts can enjoy the peace of mind that comes with a well-maintained vehicle, allowing them to focus on the adventures ahead.
About the Author
Richard Gastmeier is the president of The Part Shops, which publishes two RV and camping related blogs, RV Travel Life and This Old Campsite, as well as two e-commerce sites, Marine Part Shop and Powersports Part Shop. Richard provides quality advice on all aspects of the outdoor lifestyle through experience gained over a long tenure in the industry.