As the saying goes, “There’s no place like home!” It’s true that an RV can be made much more “homey” by putting up your own pictures and artwork. And while you don’t want to be puncturing the walls, you are feeling the itch to get some pictures or drawings up. Well, I am here to tell you that you’ve got options!
There are many ways to hang a picture on an RV wall. When hanging a picture on the wall of an RV, only look into “temporary” hanging methods rather than nails or screws. One can choose to use command strips, self-adhesive wall hooks, strong velcro, sticky tack, or putty.
These are all helpful in getting things to stay up without needing to drill holes in the walls of your RV, which you may majorly regret later.
What method you use will depend on what you are trying to hang and how permanent you want the picture to be. I don’t recommend going crazy with the full-framed, heavy glass pictures, because there are just too many things that can go wrong with them in an RV. However, if you must hang them, I will be covering that, too.
RV Walls: Not Good for Screws
Because RVs are designed to move around, there is pressure for manufacturers to make them as light as possible. This lowers how much power you will need to drive it and also increases the gas mileage that the vehicle will get while in motion.
While the outer walls are thin but strong (usually made of metal), the inner ones tend to be made of weaker wood or wood imitations. Either way, if you try hanging something via a screw, the screw will puncture through to the other side of the wall.
If you are trying to mount something to an inside wall this way, then know that you are at risk of hitting all kinds of electrical and water equipment.
If you are trying to mount to a solid, metal outer wall this way, then know that you are opening it up to water leakage and rust over time. This is pretty much always a bad idea, and I don’t recommend you try it.
How You Should Mount

Instead, try mounting with things that will stick to the wall. These devices include command strips, hanging nails, magnets, and sticky tack.
Light Items: Use Sticky Tack or Magnets
Sticky Tack
Sticky tack is incredibly useful for hanging everything from photographs to hand-drawn pictures to flags to your grandmother’s cookie recipes.
This method is my personal favorite, and this is the way I hang things up on my walls. It is perfect because it is quick, leaves no residues, and is reusable.
You can get sticky tack or some kind of mounting putty at almost any office supply store. Walmart, Target, and Office Depot all have sticky tack on the shelf.
To use sticky tack, rip off the desired amount and start working it with your fingers. It won’t form a strong bond with the wall unless it gets warmed up. Press it together with both hands, roll it between your fingers, or put it under your armpit, but do whatever you have to do to warm it up.
Once it is warmed up, then you can place it on the backside of the picture (or whatever you want to hang). Make sure that the picture is face down on a hard surface, like a countertop or a table. Press hard for about 10 seconds onto the back of the picture
Finally, press the picture against the wall, putting extreme pressure on the point where the sticky tack is located for around 5 to 10 seconds. And just like that, the picture will stick! The holding power of the sticky tack when you follow this process is actually pretty good.
With sticky tack holding your pictures, there is no need to remove the pictures when moving the RV. When you want to take it down though, just pull down lightly and wiggle it loose. This should unstick the picture from the wall with minimal damage to the photograph.
This method of hanging light pictures is great because they stay where you put them. As long as the sticky tack is “activated,” or warm, while you are hanging the picture initially, it will stick well.
This means that there is no need to take the pictures down for travel to a new campsite, they can just stay where they are and they shouldn’t fall. If they do, then it’s not the end of the world. You’ll be able to just warm up the putty and re-stick it onto the wall.
Sticky tack can be quite a useful thing to have around the RV. I personally have even hung flags, reminders, and a small whiteboard with sticky tack. If you follow the process of warming it up well, it can actually produce some solid results.
I don’t recommend using it on anything critical or anything made of glass, because it can fall over time with the heavier items, but it really tends to not
I once hung a flag for over 3 months without it budging, and it only came down because it was time for me to take it down.
Magnets
When it comes to magnets, you have some options. Do you remember how an RV’s outer walls are metal? Well, if any bare metal is exposed on the inside of your RV, take advantage of that fact and hang stuff from it with magnets. You can also use magnets to post things on a refrigerator or on the oven.
Another option for use with magnets is magnetic paint. This is an idea I have tried in the house, but that I haven’t personally tried in an RV. I include it here in case you want to research more.
Basically, it is metallic paint that looks and feels like normal paint, but once dry, it can hold magnets to the wall where it is painted. At home, it has worked fairly well for me but I leave it up to you to decide if it is something you want to try for your RV.
Heavy Items: Use Velcro or Wall Hooks
As I already mentioned, I really recommend avoiding heavy items because they tend to just not be worth the hassle. But if you really want to mount something heavy, then your best bet is to use a strong velcro or a self-adhesive hook.
Velcro can be used by attaching one side to the back of the frame you want to hang. If your velcro doesn’t have a self-adhesive backside, this can be done with superglue, a strong putty, or a glue gun. Attach the other side to the wall where you want to hang it. For security, you will want to use several pieces, at least one on each side.
While you are attaching the velcro, make sure that the pieces on the frame line up with the pieces on the wall. When you need to move the RV, just unstick the frame from the velcro on the wall and put the frame in a safe place for transport. Then when you get where you are going, put it back up and you’ll be good to go.
All about Wall Hooks
Then there is also the option of using a wall hook. A wall hook is just a hook that sticks to the wall. These come in different types, but one of the most common is the type that attaches itself to a command strip.
Command strips are very easy to use and almost never cause any cosmetic damage to the wall. On top of that, they will stay up indefinitely, until you decide to take them down, they will most likely stay sticking to the wall. Command strips can also be bought wherever office supplies are sold and are pretty cheap.
Command strips or any other type of wall hooks are great because they can be left on permanently. While you are moving the RV to a new destination, you will, of course, need to take down the frame from off the hook. But once you get to where you are going, then all you need to do is re-hang the picture on the hook and you are good to go.
Finally, you have the option of using a hanging nail. This is like a command strip with a piece of metal instead of a hook. This is what you should use in case you need to hang something a little heavier than what a command strip can support.
Hanging nails tend to have a much stronger bond and wider surface area for sticking than command strips do, and so they can support higher amounts of weight.
Look into a hanging nail if you want to hang something a little heavier. This could be a place to hang a towel, photograph, or your keys. There are even hanging nails that can hold the weight of a few bricks, so feel free to get creative with these.
These also are pretty good at not leaving marks where they are attached. You won’t find them for sale as frequently in regular stores but they can be found, or you can always find an infinity of differently styled options on Amazon.
Other Options
Know also that you have got some other options! There is not always a need to hang things directly from the wall, sometimes you can do something else that will go great lengths to make your RV feel homier. I’ve got a few ideas here:
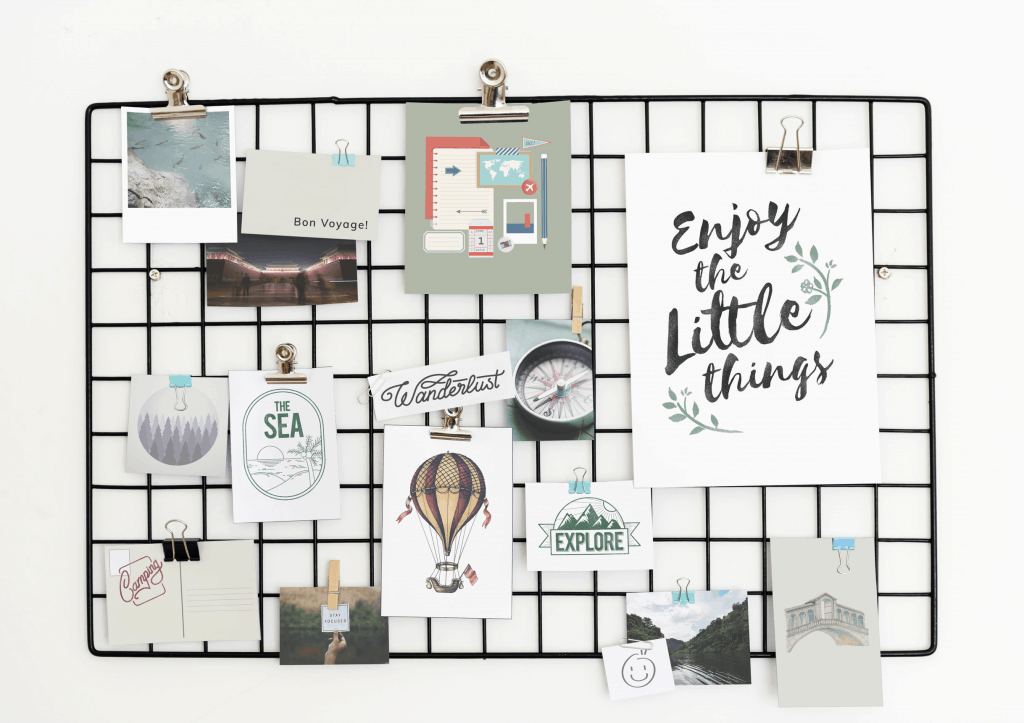
Cork Boards
A corkboard can be useful in this sort of situation as well. Using thumbtacks you can pin pictures and drawings onto a board to have them all in one place. You can then remove or add as many as you like, whenever you like.
A corkboard is a very simple thing and you can usually find one for under $10. You could try leaning it on the counter up against a wall or from the wall itself using a self-adhesive wall hook (or a hanging nail).
What makes a corkboard so great is that you can add pictures as you go. As you go out and about on your adventures in your RV, you can take pictures at each place you visit. Then you can add a new photo from every place you go, you will be able to look back at your good times and bring your family closer together.
Whiteboards or Blackboards
Whiteboards and blackboards can be a great magnetic surface for hanging your photos. Using magnets, you can hang up pictures, drawings or whatever else you want. This is another flexible way to hang your stuff, as you can switch out pictures from the board whenever you like.
A whiteboard can also be useful for writing messages and reminders to yourself and to your family. I don’t recommend a blackboard so much because of all the dust that the chalk generates, but of course, it is completely up to you.
Either way, a good place to draw can break up the boredom on long trips and unleash the creativity of both yourself and your kids. They can also be a great spot to jot stuff down to remember.
Sure, phones have to-do lists nowadays, but if you are trying to get away from technology while camping, this can help you escape from needing to have a phone on your person all the time.
Clothespins
Here we are getting even a little more creative! Clothespins can be used to hang items from a line. All you need to do is set up a good line and then the clothespins can be placed on it, clutching the paper or photograph that you want to hang between its two prongs.
This line you hang can be a piece of string, a piece of fishing line, a piece of baling wire, a piece of hemp, a string of Christmas lights, or anything else you can think of. It all just depends on what look you are going for and what you have available.
Tie this string to a solid surface on either end, such as an exit handle, windowsill, the blinds, etc., and BAM! You’ve got someplace to hang things by taking advantage of your 3-dimensional space.
Hi Jim, thanks for this great info. I’m tempted to use acrylic double-sided tape to mount small framed photos directly inside my RV (on the textured wallpaper) but you don’t suggest it. Personally, I am afraid it’d be impossible to remove/change without risking damage. Is this why you don’t include it on your list of options?
Your advise is greatly appreciated, thanks!