RV tire safety doesn’t happen by chance. When was the last time you’ve given your RV tires some love? Let it start with this essential guide to choosing and maintaining tires for trailers and motorhomes.
These hefty rubber behemoths may be several sizes larger than the average car tire. But they’re still susceptible to many of the same issues. Underinflating, overinflating, low pressure, punctures, and other external damage happen to motorhome and trailer tires too. Here’s how to avoid RV tire blowouts and other RV wheel catastrophes.
Essential Guide to RV Tire Safety
Changing and replacing your vehicle’s tires can be a pain due to their sheer bulk, but it’s something you’re going to have to do as an RV owner. Since this job often means lifting your RV on jacks, it’s paramount you prioritize your safety.
In this article, I’ll tell you exactly how to replace your RV tires safely. I’ll also go over many other areas in which tire safety comes up, such as tire inflation, tire pressure, avoiding blowouts, and tire storage during the offseason.
RV Tire Letters Explained
If you look at your RV’s tires, there are a series of letters and numbers on them. These letters and numbers may vary from one tire to another on your vehicle. What do they mean? Are they worth learning or can you just ignore them?
You definitely shouldn’t ignore them. The letters and numbers tell you a lot of valuable information about your tires. Let’s decipher them now:
- B: B, D, and R are all tire casing construction types. B refers to belted bias.
- D: Another letter referring to tire casing construction. In this case, it’s diagonal bias construction.
- DOT: The DOT number is the abbreviation for the U.S Department of Transportation serial number. It may have three or four digits. If your tires were produced in 2000 or later, then it’ll be four digits. It was before 2000, it’ll be three. The digits refer to the specific week and year the tires were made. The week is in the first digits and the year in the latter two. Remember, it’s the week and not the month. So 05 refers to fifth week of the year (late January or early February), not May.
- H: An H on your tire is part of a max speed rating classification. You may see letters A through G, but the most common ones are H onward. These tell you how fast you can go without damaging the tires and risking a blowout. In the case of H, it’s 130 miles per hour (MPH).
- P: If you have a passenger tire, it will be marked with a P. In this case, P doesn’t mean “passenger tire” but rather PMetric.
- Q: The max speed is 100 MPH.
- R: Going back to tire casing construction, R refers to radial construction.
- S: 112 MPH is the max speed.
- T: 118 MPH is the max speed.
- U: 124 MPH is the max speed.
- V: 149 MPH is the max speed.
- W: 168 MPH is the max speed.
- Y: 186 MPH is the max speed.
- Z: 187 MPH and higher is the max speed.
What Are 10-Ply RV Tires?
Every RV tire has what’s known as a load range or ply rating. For the rest of this article, I’ll only call this term the ply rating.
Okay, so what is the ply rating? It refers to the limits on tire inflation pertaining to the max load of the vehicle. If that load exceeds the ply rating, then the tires could explode or give out.
Now, each RV tire also has its own plies. This ply total does not contribute to the ply rating one way or another. That may be a little confusing, but bear with me.
Tires, back in the day, were constructed of cotton layers instead of rubber.
During that time, the ply rating counted the total plies of the tire for a determinant of tire strength. That’s not the case today in any regard.
First, the ply rating has more to do with load, as I mentioned. Second, tires aren’t made of cotton anymore. Could you even imagine if they were?
Unfortunately, all the terminology from the old days isn’t completely gone. For instance, knowing what you do about the ply rating now, if you have a 10-ply tire, then wouldn’t it be reasonable to assume it has 10 plies? Yes, but yet that’s not always true.
The heaviest-duty tires are 10-ply yet in reality have maybe three plies max. The standard is typically two. Some tires are even one-ply.
While you do want 10-ply tires, because these are the strongest, they can handle the biggest loads, and they can withstand high pressures, these tires do not have 10 plies. It’s just old terminology that has stuck around. It doesn’t make these tires any weaker, but it’s not the most accurate term.
How to Inflate RV Tires
You have two options when it comes to tire inflation: a good, old-fashioned air compressor or a nitrogen system. Let’s talk about both methods in more detail.
Air Compressor Inflation
This is the simplest and fastest option, mostly because your air compressor should already be somewhere in your vehicle. That means you don’t have to go out and buy a separate air compressor unless yours breaks. How convenient!
What’s convenient isn’t always best, admittedly. Using an air compressor for tire inflation is an okay option, but just okay. Your engine must be on the whole time the air compressor is filling the tires, which may be a while. The amount of time this takes, coupled with the release of exhaust and all the noise is a deterrent.
Also, you won’t always get correct tire pressure readings since air compressors can cause pressure fluctuations.
Nitrogen System Inflation
That’s why portable air inflation systems like nitrogen systems are more appealing in the eyes of many RV owners. You can choose from nitrogen systems of several sizes, such as:
- An 88p compressor that reaches 120 pounds per square inch (PSI) on 33-inch tires
- A 300P compressor that can achieve 90 through 150 PSI on tires 34 inches and up
If necessary, you can even get a 400P nitrogen compressor.
Other perks of nitrogen compressors are their ease of use and silent operation. You’ll also release far fewer emissions with one of these systems.
Is It Safe to Use Nitrogen-Filled RV Tires?
If you’re concerned about nitrogen-filled RV tires, it’s likely because you’re thinking of nitrogen more as a chemical. After all, when in liquid form, nitrogen is a popular ingredient for vehicular coolant. In its gas form, though, nitrogen is a naturally-occurring substance. It has no smell or color.
You’ll find nitrogen in air. In fact, according to Popular Mechanics, air includes portions of argon and neon (noble gases), larger portions of carbon dioxide and water vapor, little oxygen (roughly 21 percent), and mostly nitrogen (78 percent).
Inflating your RV tires with nitrogen over oxygen is safe.
Some experts call for exclusively using nitrogen for tire-filling purposes. There are several reasons for this.
Humidity. This water vapor within the tires can lead to aluminum and steel rim corrosion and/or rusting when humidity builds up. You’ll also deal with more frequent internal tire temperature changes as well as pressure alterations.
When you use your standard air compressor to fill your tires, the chances of humidity getting into the tires increases. With nitrogen-filled tires, there’s a purging and filling method that will eliminate excess water and oxygen.
Tire temperatures don’t remain consistent. Tires may be cool when not in use, but as soon as you hit the road, they’ll soon heat up. When this happens, the air within the tires from your air compressor will too become hot. That’s because oxygen permeates through the rubber of the tires much faster than nitrogen. That could once again change tire pressure. With nitrogen-filled tires, there’s less risk of pressure fluctuations.
How to Test RV Tire Pressure
Consult your owner’s manual first. There, you should see the maximum inflation pressure recommendations. If you can’t find the info in there, check your RV’s certification label. You can also contact your RV manufacturer directly and ask them.
In most cases, each tire has a different max pressure. The recommendations are based on the tire’s load, and that varies per tire. That’s why you should always rely on the info in your owner’s manual rather than assume you know the right pressure.
Do not surpass the max inflation pressure as recommended by your manufacturer.
Doing so is overinflating the tires, which causes a myriad of issues. The overinflated tire will wear down faster than the others. It will also have less traction since all that extra pressure is pushing on the tread and sidewall. If worst comes to worst, the tire can even explode.
Keeping your tire pressure too low, whether on purpose or accidentally, is also a bad idea.
The treads can come apart, wear and tear can occur, and once again, the tires can explode. This is because too much friction builds up when the underinflated tires rub against asphalt or other driving surfaces.
You only need a basic air gauge for checking tire pressure. To get the truest reading, your tires should have been inactive and cooler in temperature. If you’ve gone more than a mile in your RV, you’ll have to wait for the tires to cool down to do a pressure check.
Otherwise, hot or warm tires can bump up the PSI higher than it actually is. You could get a reading that’s inaccurate by 10 to 15 PSI.
Knowing that, you could theoretically test tires when they’re warm and then subtract 10 or 15 to get your pressure. Still, the reading won’t be completely accurate. It really is better to wait and then check the pressure.
It’s recommended that you make it a point to test your RV tire pressure monthly. Once you’re on the road, start each day with a pressure check. Before the offseason and right after, you should once again test tire pressure.
Step-by-Step Guide to Change RV Tires
Eventually, your current RV tires are going to be gone to the point of no return. This could have been from misuse or just simple wear and tear. If it’s the latter, then it may be four or five years before you need new tires, but it will happen.
How do you go about taking your old tires off and putting the new ones on? In this section, I’ll go step by step and explain. I do caution you to be as careful as possible when replacing tires.
RV Tire Change Tools
- Wrench
- RV tire(s)
- RV jacks (two)
- Park your RV in an open space where you can get full access to all sides of the vehicle.
- Set up your emergency brake.
- Grab your first jack and place it against the front wheel. The jack should sit against the RV’s frame. If it doesn’t, it’s not secure.
- Do the same with one back tire.
- Begin lifting the rear tire so it’s off the ground. The jack should be pressing against your RV’s frame.
- Repeat with the front tire. Continue pumping it up three times beyond where the back tire is.
- Now move the back tire up three pumps.
- Repeat pumping for both tires. If you can fully rotate the tire without it touching the ground, then the tires are up high enough.
- Starting with your first tire, take out lug nuts with your wrench. Don’t throw these away!
- Put your new tire where the old one was, screwing it in with the old tire’s lug nuts and your wrench.
- Repeat with the other three tires as necessary.
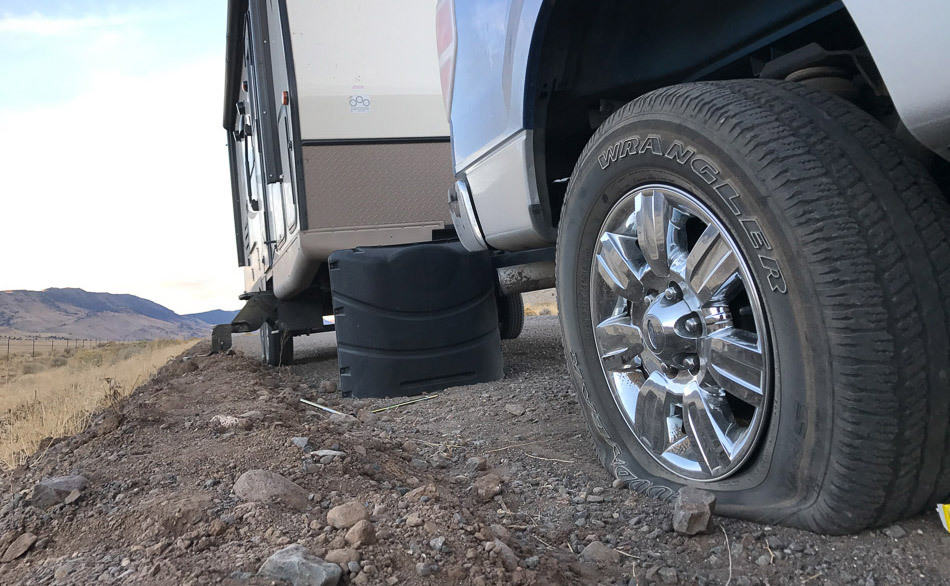
How to Avoid RV Tire Blowouts
Two of the biggest ways your RV tires can blow out are by underinflating or overinflating them. I mentioned the perils of both two sections back. By regularly testing your tire pressure when the tires are at a cool or cold temperature, you can ensure your pressure is ideal before the start of every adventure.
That’s not enough to keep tires healthy on the road, as there are other ways blowouts can occur. If, for instance, your tires are older and you haven’t had them inspected in a while, you can never be sure if the tires are healthy enough for long-term or even short-term driving. It’s recommended you get your tires inspected every 90 days.
The amount of weight you’re putting on your tires could also cause them harm.
If you have an overweight RV, the tires can’t handle it and will collapse under the pressure. Failing to maintain proper weight distribution can also pop the tires that are holding the most weight.
If your tire treads are old or worn down, that’s another sign a blowout can be imminent. To determine if you need new tires based on the treads alone, try the coin test. Grab a quarter or penny and fit it into the grooves of your tires. The coin should stand straight up. If it can’t, then the treads are too worn down to continue driving.
Best RV Tire Tips for Winter RV Storage
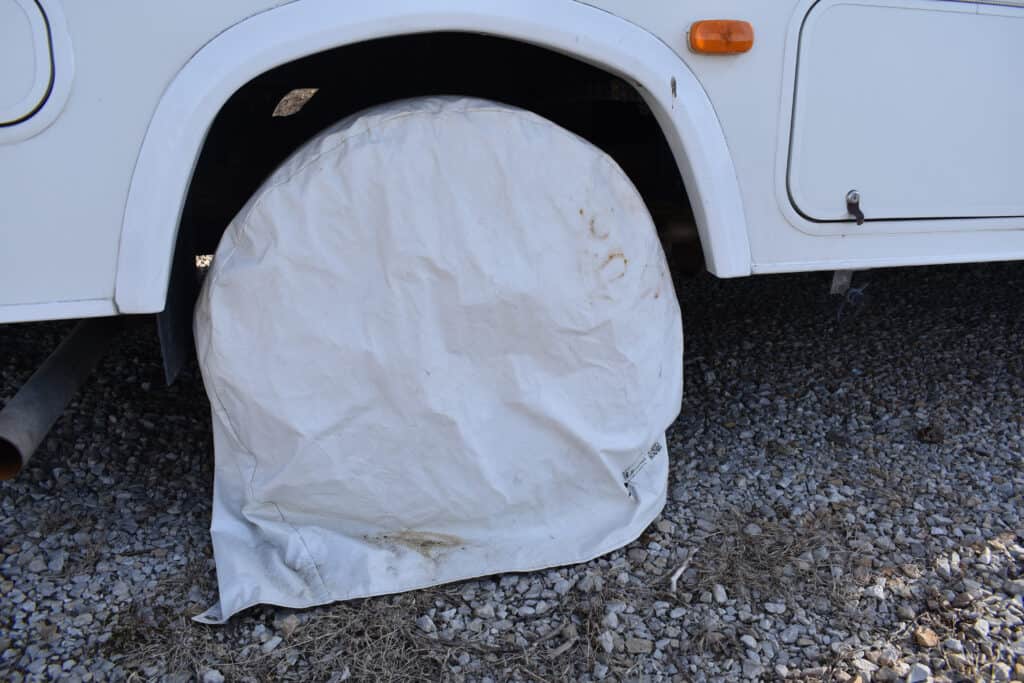
When the time comes to winterize your vehicle, it’s recommended that you remove your tires and keep them in storage during the offseason.
You can’t just put them anywhere. Be sure to stash your RV tires in an indoor environment with no air currents and no direct sunlight. The space should also be dry, cool, and clean (no grease, oil, or wetness).
Most tires can withstand water, ozone, and sun exposure, but the rubber doesn’t last as long. If you keep your tires in an indoor area like described above, you’re extending their lifespan.
How to keep your tires in the best condition possible
- Keep all snow, sand, and other reflective surfaces away from your tires. These will wear them down faster.
- Also, heat-absorbent surfaces can be just as damaging. That means no asphalt for your tires.
- Keep the space you’re storing tires in free of ozone generators such as electric motors.
- Having a warmer winter? That’s fine. Make sure your tires are at a 15 PSI pressure reading. This way, when that winter weather finally does strike, the tires will have some pressure to lose.
- Remove your rims if possible. If not, check the tire pressure and make sure it’s at 10 PSI.
- Polyethylene bags are recommended for each tire. The bags shouldn’t be totally translucent. When used correctly, polyethylene bags can prevent most ozone and oxygen damage.
- If you’re storing more than one tire, put them on top of each other. Make sure the tires sit evenly.
Conclusion About RV Tire Safety
When doing any RV maintenance, it’s always important to put safety first. By filling your tires with nitrogen instead of oxygen, testing tire pressure often, and knowing what blows out tires, you can prevent nasty, sudden busted tires.
You’ll have to change out your tires at some point. With the use of jacks, raising your RV to the correct height isn’t difficult, but you must always be careful not to hurt yourself. Finally, by stashing your tires the right way, you’ll know you can rely on them come the spring.
Good luck and safe driving!


I have seen “experts” reccomend both filling trailer tires to max sidewall pressures and to alternately fill them based on the load at each tire. The second option can vary greatly depending on fresh water, grey water and black water tanks levels. Also the amount of consumables stored.
At this point I find it difficult to have faith in either of the experts. I generally estimate max trailer weight and divide by 4 for individual tire weight. I choose to select the highest tire weight and use it for all four tires. I then add 10 percent and fill all tires equally as long as this is below the max stamped tire inflation temperature.
This seems to have been working for my rv and utility trailers for the last 20 years. Never had a trailer tire failure.