Let’s face it: travel trailers are not like regular houses. The most common travel trailer problems RVers experience are universal. These trailer problems happen for two reasons: normal wear and tear, or neglect. Oftentimes ignoring travel trailer maintenance is the culprit. Here’s what you need to do to prevent or fix these issues in your RV.
Prevent (or Fix) the Four Most Common Travel Trailer Problems
If one of these RV problems happen while you are out camping, it can ruin your trip. Don’t pretend it can’t happen to you. Be prepared! Here are the four most common travel trailer problems:
- Plumbing repairs: burst water lines and broken water pumps are the two most common situations.
- RV toilet issues happen to the best latrines. Usually it’s a simple fix, like replacing a worn seal.
- Trailer tire problems: tire failure (blowouts) are common and preventable.
- Trailer rubber roof damage: thankfully, a roof tear can be a temporary, easy fix.
Plan ahead for these common trailer problems and you can avoid hassles on your next adventure. Here’s how.
Problem 1. Broken RV water line or water pump issues.
The issue with your water lines or water pumps is during the winter months. Most people use their travel trailer during the summer months for fun camping trips.
However, during the winter or cold months, the travel trailer is often put in storage. The issue with this is that when there is water in the line or pump, it could freeze over and ultimately burst your line.
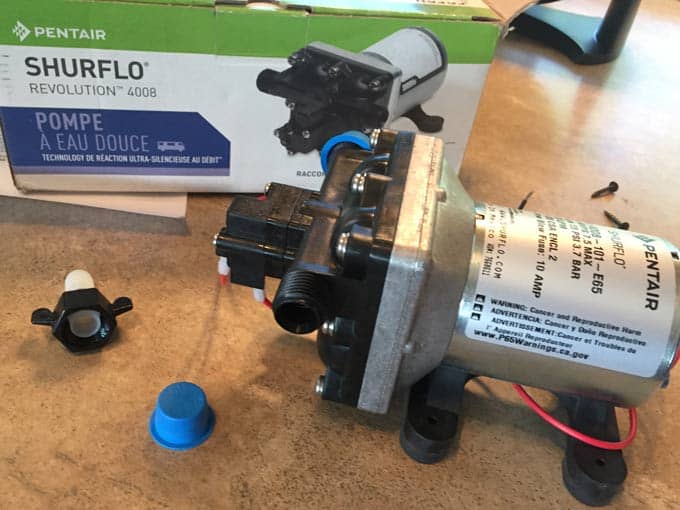
The Solution: Fix Your Broken RV Plumbing or Water Pump
To fix your broken water line, there are a few steps you must take.
- Turn off the water pump.
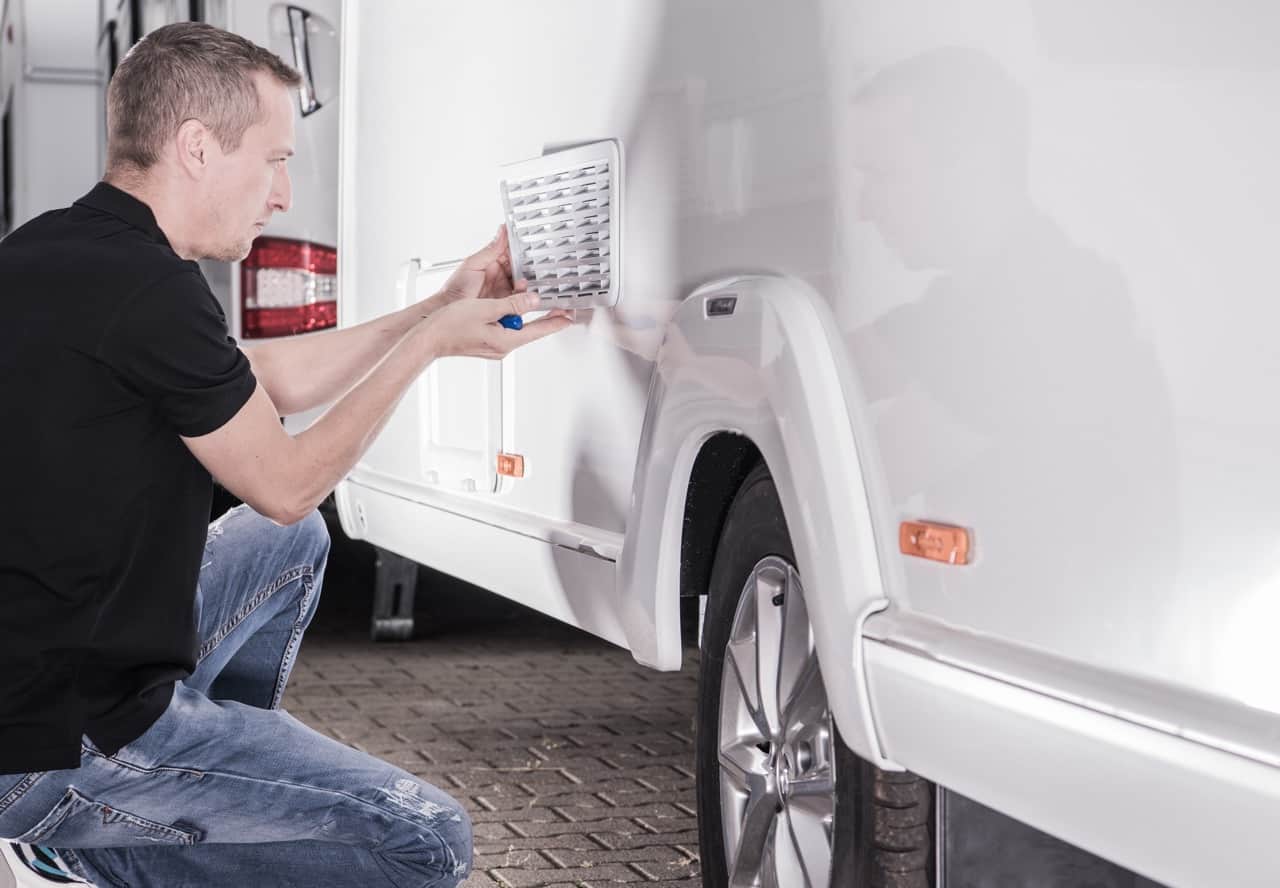
- Find where the leak is coming from. Check all around the travel trailer. It could come from the removable panels behind the shower faucet, inside cabinets, or under the RV.
- Locate the water line that is spraying out the water. This line could be made of copper or plastic.
- Cut out the part with the slit.
- Rejoin the two ends together.
- Use a compression union fitting.
- Tighten with a wrench.
- Turn the water pump back on.
Preparation for the Job
To avoid this issue, you will need to flush out your water systems before you send the travel trailer to storage. I would recommend that at the end of summer, when you know that it will be your last camping trip, flush out your water system right then.
To flush your RV water system:
- Hook your clean water hose to your garden tap
- Connect the other end to your clean water intake connection.
- Open your grey tank.
- Turn on all the faucets.
- Flush until the water runs and tastes clean.
- Repeat steps 1-5 on your holding tank.
Problem 2. Broken RV Toilet.

Compared to your at home toilet, your travel trailer toilet goes through a lot. When you are driving, that toilet is bouncing up and down, to the left and the right consistently.
Some common problems with RV toilets are the water not staying in. Or, having an inconsistent water flow. There may also be valve or rubber seal problems.
Toilet issues may seem insignificant. However, they can ultimately lead to issues with your water supply. Water damage is a costly fix.
How to Fix Your Broken RV Toilet
To fix the issue of your broken travel trailer toilet, you must:
- Turn off the water pressure.
- Flush the toilet. This bleeds off remaining water pressure and empties the water out of the bowl.
- Remove bolts from each side that secures the toilet to the floor.
- Lift the toilet away from the wall.
- Order the part that needs to be repaired.
- Pour a quart of water into the toilet to make sure the seals will hold.
- Put pressure on the water line to make sure the valve won’t leak.
- Install a new rubber seal between the toilet and the floor.
- Bolt the toilet back to the floor.
Note: you may want to lay out cloth rags across the hole in order to prevent the odors. This will also keep anything from falling in the water tank.
Preparation for the Job
To prevent any issues from arising regarding your travel trailer toilet, there a few things that you should do.
- Repair the toilet seal. When seals get hardened or dried out, leaks can happen. Replace the seal before any issues arise.
- Clear your holding tank sensor. The sensors can be sensitive and sense a big of residue. This will give you inaccurate results. By dropping ice into the toilet, the cubes will move around and remove anything that is lodged in your tank.
- Treat your tank. Tank treatments help break down wastes. It also allows for a cleaner rinse when pumping out your tank.
- Keep your toilet bowl clean. Keep a plastic cup by your toilet. Fill the cup with water and pour it around the toilet bowl while flushing.
- Use travel trailer friendly toilet paper. The toilet paper you use should be able to go down and dissolve in the holding tank. This will prevent clogging or a broken system.
Problem 3. RV Tire Failure (blowouts).
This is an issue with any vehicle. However, it is problematic to have flat tires. Tires are very vulnerable to road debris.
There could be damage from not using the tires. Having a blowout would be one of the worst scenarios, especially if you are deep in the mountains.
Lucky, there are things you can do to fix the issue and altogether avoid the third most common travel trailer problem.
How to Change a Travel Trailer Tire
If you ever have a RV tire blowout or flat tire, you will need to replace that tire. Here is how to replace your travel trailer tire.
- Pull away to a place where there is no traffic.
- Use a lug wrench to break the lug nuts loose.
- Drive the good tire on the same side as the flat tire onto a ramp.
- Make sure the tire that needs to be changed spins freely. If it doesn’t, increase the height of the ramp by adding blocks umder the ramp.
- Chock your tires on the side that you’re not working on.
- Set the vehicle’s praking brake on.
- Use the lug wrench to remove lug nuts on the flat tire.
- Remove the tire from the hub.
- Install a spare tire on the hub.
- Lubricate studs before placing lug nuts on.
- Tighten the lug nuts in a star pattern.
- Drive off the ramp.
- Torque the lug nuts until tight.
- Check the air pressure in all the tires.
Prepartion for the Problem
Although it is fairly simple to replace your tire, that is not a step you want to take during your camping trip. To avoid that, here are a few tips to prevent any tire problems.
- Always have the proper inflation. Tire failure will often come from under inflated tires. Check your tire pressure, especially before you head out on a trip.
- Inspect the tires for wear and damage. Make sure you are getting enough traction. Also, look at the tire for cracks. If there is any uneven section, that could be problematic.
- Don’t overload your travel trailer. Putting too much weight into your travel trailer can lead to strain and stress on the tires. Limit the weight and distribute it evnely.
- Store your travel trailer with tire covers. Things such as sunlight, weather, and ozone can cause your tire to deteriorate.
Problem 4. Trailer Rubber Roof Damage.
Your travel trailer is not built with the same materials as your regular home. The roof is susceptible to issues because of its material. Most travel trailer roofs are made of rubber. This is beneficial in order to allow for mobility. However, damage can come from exposure to sunlight and being parked around hanging debris.
How to Temporarily Fix a Travel Trailer Roof Tear
Eternabond RV roof hole repair is a simple solution to a complex problem. Damage to your travel trailer’s roof can be very bad especially with precipitation.
Preparation for the Job
In order to keep your travel trailer’s roof from having any damage,
- Determine if the roof has life in it or if it needs to be replaced. If it isn’t too damaged, then continue to protect it.
- Keep the roof as clean as possible. Dirt can cause the rubberized material of your roof to crack. By simply getting a long duster, you should be able to push off all the debris from the top of your roof.
- Seal the cleaned roof surfaced. Apply a silicone-based sealer. This will help keep your roof lasting strong for a long time.
There are three types of roof materials: fiberglass, rubber, and aluminum. You roof maintenance will differ depending on the material.
These four issues are the most common problems that will arise with owning a travel trailer. However, some other issues are manmade. Regular preventive travel trailer maintenance is key to avoiding more problems.
Maintaining Your Travel Trailer:
Perhaps the biggest problem that comes from travel trailers is the owner forgetting about it. A travel trailer is kind of like your child. If you don’t check on it, bad things will happen. You want to take the best care of your travel trailer.
Some tips to preserve your travel trailer are:
- Inspect the roof seals and seams of your RV. Check the seals and seams every three months. Use sealant to patch up any holes if needed.
- Tighten your RV’s wheel lug nuts and check tire pressure. This is especially important before you head out on a trip. Between storage and the road, issues can arise with your tires.
- Check the RV batteries. Do your best to keep the battery fully charged at all times. The last thing you want is a dead battery.
- Keep the trailer waster water system in good condition. To avoid excessive buildup or clogging, flush your system out regularly.
- Keep your travel trailer brakes maintained. This should be something on your spring to-do list.
- Clean and treat your RV slide outs. To clean the slide out, you should lubricate the slider mechanisms and make sure they run in and out with the least wear and tear on the motor.
- Keep the awning maintained. Make sure there is no mildew and mold buildup. By doing this regularly, you can prevent any tears or damage.
- Make sure the electrical connection from your travel trailer to the tow vehicle is working. This is so important to keep you and your family safe on your trip.
Final Tip: How to Store your Travel Trailer in Winter
Tips to protect your travel trailer from winter damage:
- Use a tarp or cover. Make sure the cover is breathable so moisture doesn’t stay beneath it. Moisture allows mold to grow, so this will help avoid that.
- Mouse proof the travel trailer. Make sure there are no holes where any mouse or insect will fit into. Put up protective traps or spray.
- Remove all food. A few crumbs will be sniffed out and may cause damage to your travel trailer.
- Use Insulation Foam. Although the travel trailer will be in storage, it will help to have insulation for the protection of the pipes.
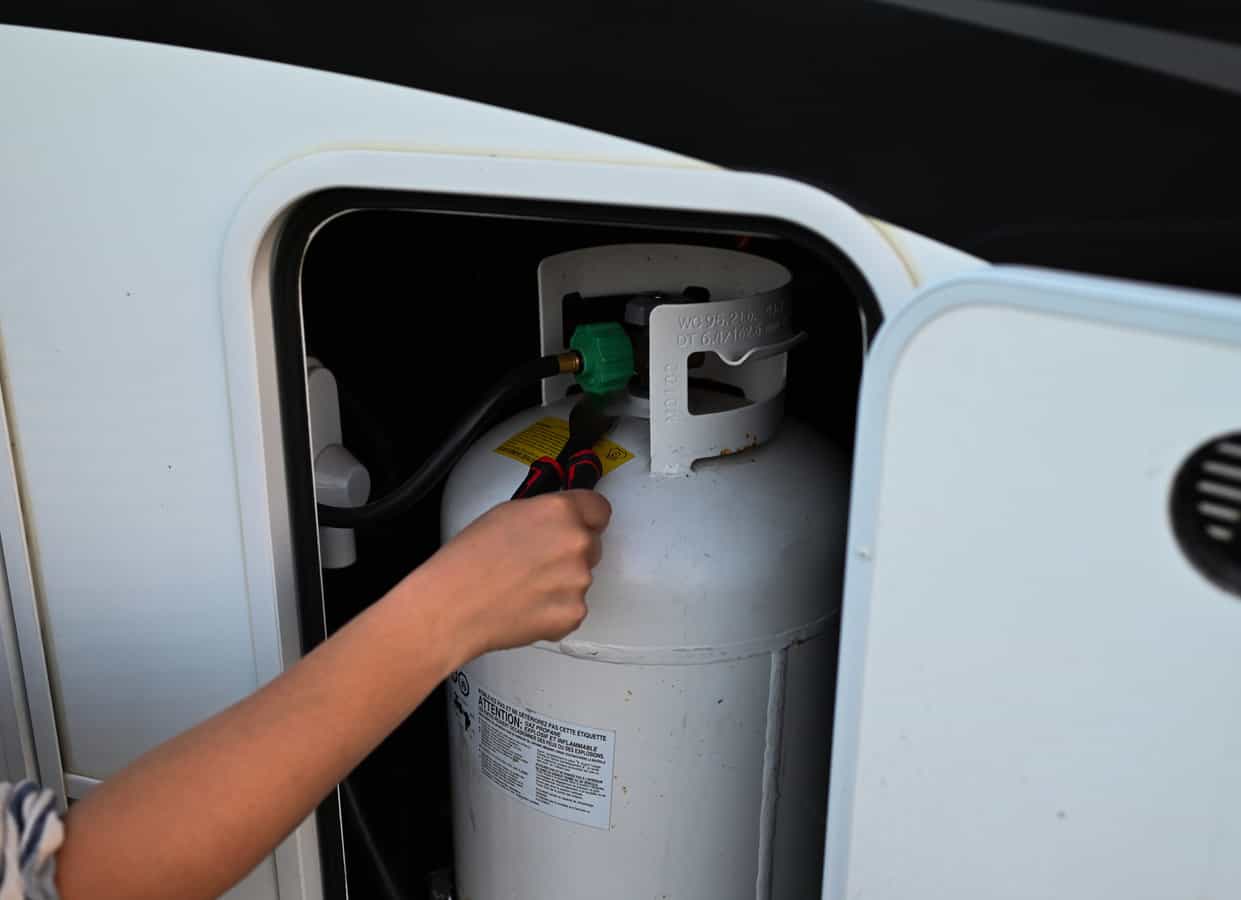
- Remove propane tanks. This helps to keep your lines clean and any debris outside of them. You can store your propane tanks in well-ventilated areas so they do not rust.
- Flush out the water system. This is so crucial to maintaining your travel trailer. This will prevent pipe bursts.
- Take out any perishables. These may also be a temptation for little critters to come into your travel trailer. Also, they could deteriorate. You can use these in your home.
These tips will help to maintain your travel trailer during the winter months. Just remember to inspect your travel trailer when spring comes again.

The camper is a ultra lite North Trail 26 DBSS
i’m trying to winterize my north trailer 26 DBSS. I have blown out the tanks and now to put the antifreeze in i stuck the hose in to the antifreeze jug turned on pump and nothing happens. The antifreeze in the jug seems to vibrate but will not move.